 I realized I didn’t have potatoes in like a few months, so I figured it was probably time to learn how to make potatoes on my own. Plus I found this recipe that used parsley, which I needed to use up before it went bad.
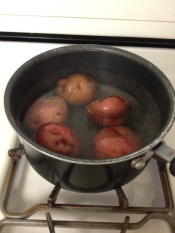
Some things I learned: potatoes take much more time to make than I would have thought. I also learned to make sure I put water completely covering the potatoes because otherwise they won’t actually cook for the first ten minutes.
As well, be careful when dumping out the water from the pot into the sink. I accidentally dropped one potato down the disposal, which was very sad because an extra potato would have meant more scrumptious food. Woops. I tried to get out out of the disposal, lest it still look edible, but the potato was cooked so perfectly I wasn’t able to get it out.
 The recipe I used for these potatoes was pretty simple. You mix together olive oil, salt, garlic salt, pepper, cayenne pepper, and parsley. The recipe also says you can add jalapeño pepper but I figured the cayenne pepper would give it enough of a kick.
I would recommend chopping up the parsley. The recipe doesn’t specifically say you should but if you look at the pictures, the parsley was definitely chopped up. I tried doing it in the bowl after I mixed together the mixture and it didn’t really work out.
 Then you’re supposed to use a fork and mash the potatoes up. My sister is really good at mashing potatoes. I clearly didn’t inherit that skill because they weren’t really mashing up, so I just ended up cutting them.
After you mash the potatoes, you drizzle on the mixture you created and pop them in the preheated oven for a half hour.
T hese potatoes are probably one of the most delicious things I have ever eaten. However, you really can’t eat these potatoes without a glass or two of milk or water. They definitely have a kick to them that make them a little spicy. If you’re like me and don’t like spicy food, don’t add in the jalapeño peppers. The rest of the mixture will be hot enough.
I would highly recommend trying these. Although they take a long time to make, I know I shall be eating these again!
…But next time I will make sure I don’t drop a potato down the disposal.
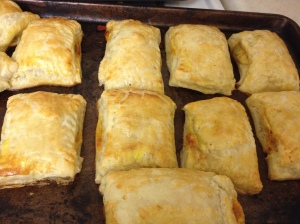 Let me tell you – avocado, cream cheese, and salsa pockets are scrumptious. The flavors worked in harmony and the mixture of the hot puffed pastry contrasted with the cool avocado and cream cheese.
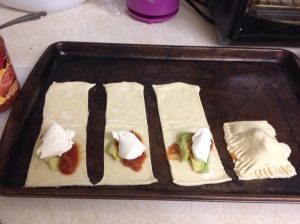 While finding puffed pastry sheets in the grocery store was tricky, these were incredible easy to make. Basically to make these you just cut the puffed pastry sheets into squares. I attempted to make mine hot pocket sized but as you can tell from the picture, they turned out a bit bigger than hot pockets.
 After you put the ingredients on the pocket, you just use a fork to close the pocket and stick them in the oven. Keep an eye on them while they’re in the oven so they turn a nice golden brown and don’t burn.
 The college I went to had these absolutely delicious peanut butter bars. Every single time they were offered as a dessert, I HAD to get one…or two (…or three). Not sure if it was the peanut butter bottom or the chocolate top but I was hooked. After I graduated college, I was devastated that I had to leave these delicious bars behind.
 The second problem concerned the graham crackers. The recipe calls for graham cracker crumbs, so on my first attempt I tried to break up the graham crackers using a spatula (see picture on the left). But then I quickly realized that breaking graham crackers up with a spatula is super messy. More crumbs ended up on the floor than in my little pile of cracker crumbs. It’s also very time consuming.
 You may be thinking to yourself, there’s no way you could have a problem with the rest of the recipe. That is where you would be wrong my friend. This recipe calls for melting the chocolate in the microwave or in a metal bowl over simmering water. Didn’t have a microwave, since a former roommate took hers when she moved out, and didn’t own a metal bowl. So I did what any normal person would do – I just heated the chocolate on low heat and hoped it would turn out correctly. Which it did!